VSCode Extension
ZenCoder's VSCode extension gives you a streaming chat panel, file context management, and model switching — all without leaving your editor.
Cmd+Shift+P (macOS) or Ctrl+Shift+P (Windows/Linux), type ZenCoder AI Chat, and press Enter to open the chat panel.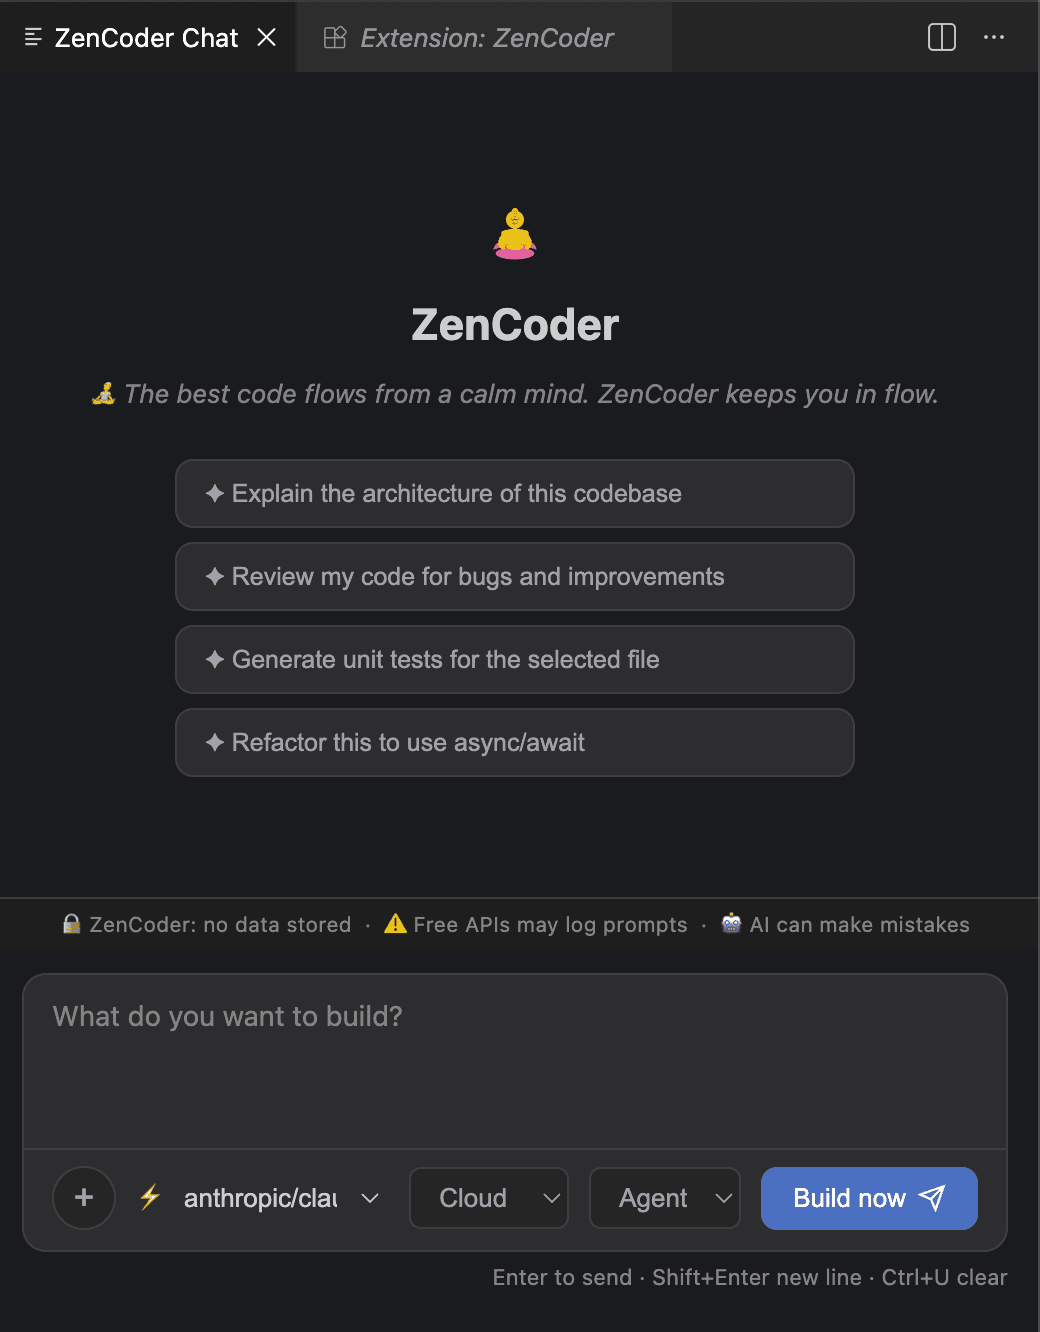
Chat panel UI walkthrough
Choosing the right routing mode
The routing dropdown in the chat panel controls which models ZenCoder sends your request to. Pick the mode that matches the model you have selected.
You want ZenCoder to decide
Tries your selected model first. Falls back to the next available model if it's unreachable. Good default for most users.
You have selected an Ollama or LM Studio model
Routes only to locally-running models (Ollama / LM Studio). Never makes an outbound network call. Use this when working offline or for privacy-sensitive code.
You have selected a cloud model (NVIDIA NIM, Anthropic, OpenAI, etc.)
Routes only to cloud providers. Requires a key registered via zencoder-secrets. Use this when you need a larger or more capable model.
Context management
Add files and folders to give ZenCoder precise context about your codebase.
- 1
Add a file
Click the + button → Add File → select a file. It appears as a chip in the context bar. The context size updates at the bottom.
- 2
Add a folder
Click + → Add Folder. ZenCoder scans the folder and adds all relevant source files respecting
zenCoder.maxContextBytes. - 3
Clear context & session history
Click + → Clear all to remove all attached context items.
To also clear the conversation history, type
/clearin the chat input and send it — this resets the session so the model starts fresh with no prior messages.
.zencoder/chat/context.json per workspace, so they survive VSCode restarts.Keyboard shortcuts
| Shortcut | Action |
|---|---|
| Enter | Send message |
| Shift+Enter | New line in message (without sending) |
| Ctrl+U | Clear the input field |
| Cmd+Shift+P | Open Command Palette → type ZenCoder: Chat |
VSCode settings
Configure via Cmd+, → search ZenCoder.
| Setting | Default | Description |
|---|---|---|
| zenCoder.agentAddress | http://127.0.0.1:7777 | Daemon address |
| zenCoder.maxMessages | 100 | Chat history size |
| zenCoder.maxContextBytes | 200000 | Max context per request |
| zenCoder.autoDetectSkills | true | Auto-apply AI skills |
Session management
Sessions are stored in .zencoder/chat/ per workspace.
ls .zencoder/chat/
# session.jsonl       — conversation history (capped at maxMessages)
# session-meta.json   — selected model
# context.json        — current context items
# exports/            — markdown exports
Next
Agent Mode — multi-step autonomous coding